

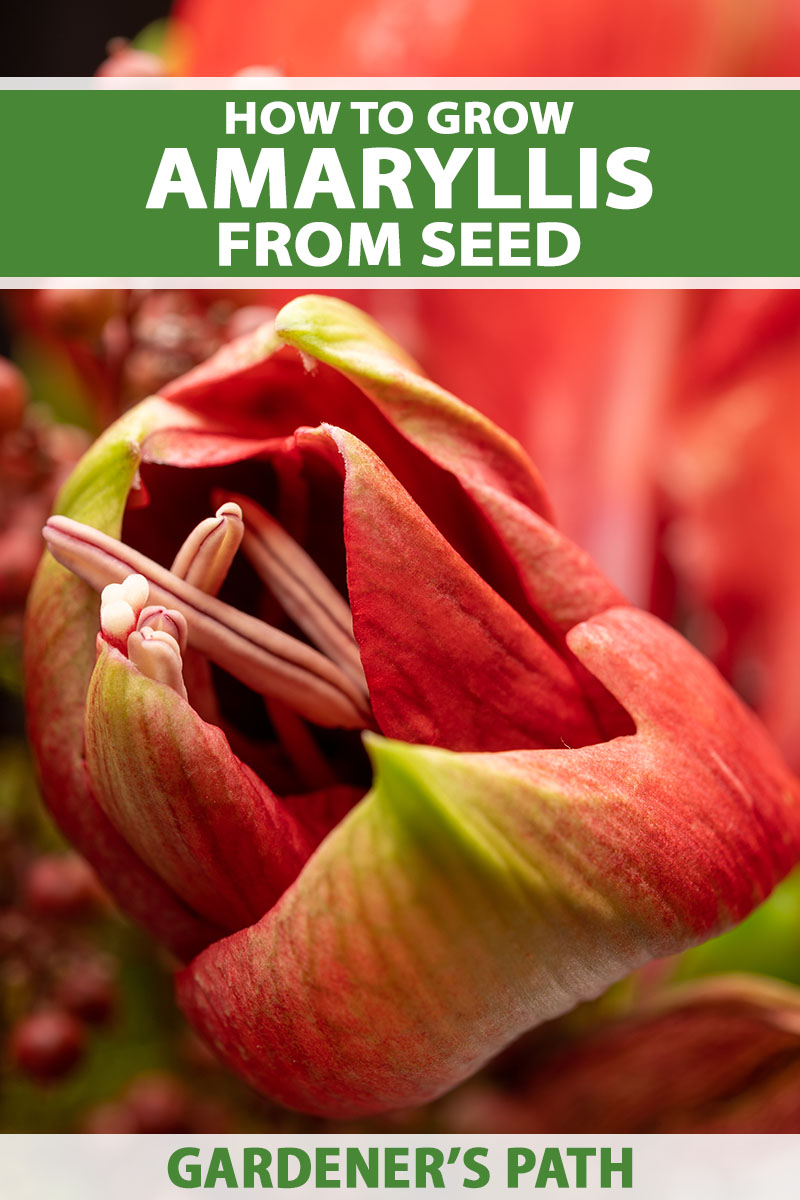
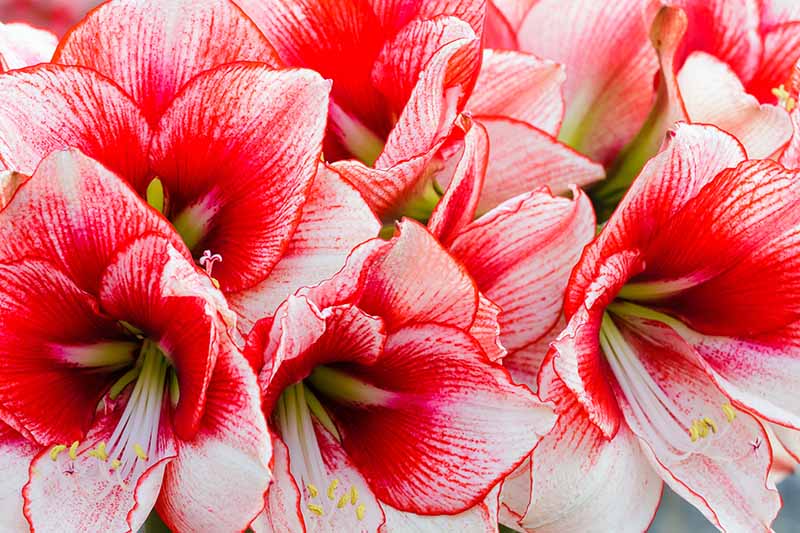
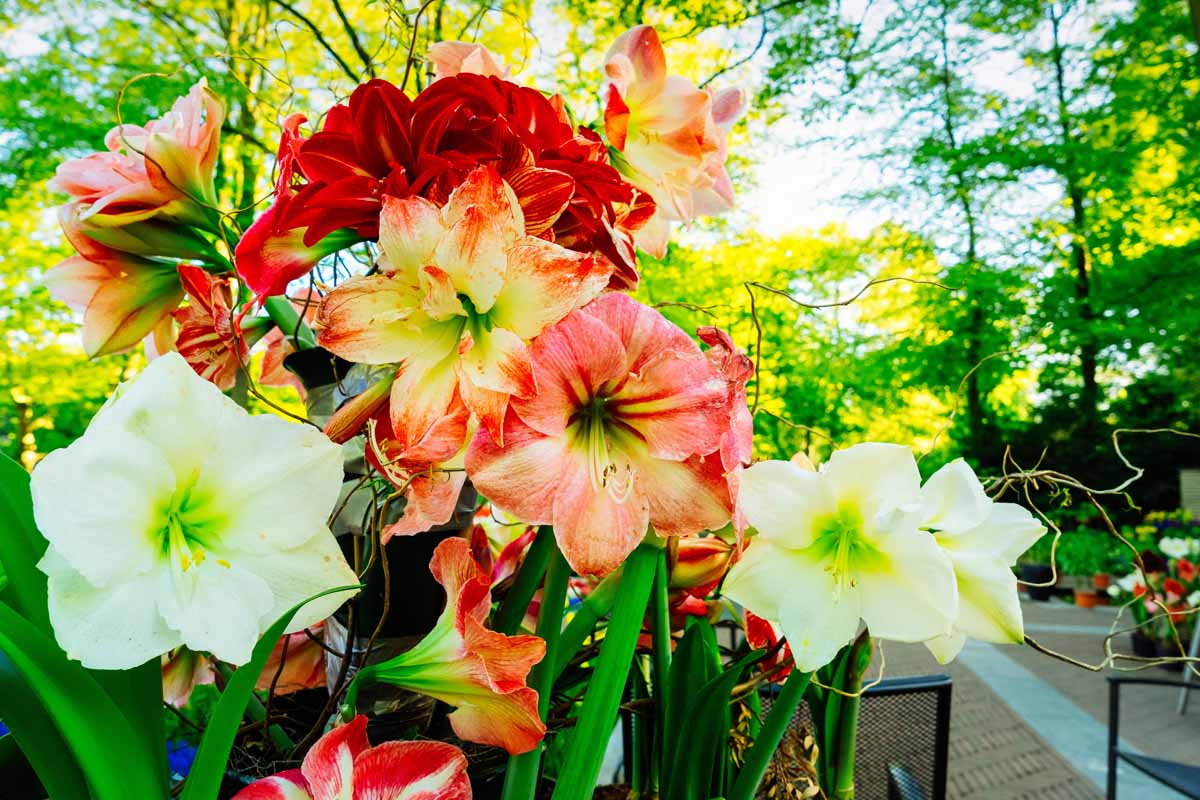
The massive, eye catching blooms of amaryllis, Hippeastrum x hybridum, can add astonishing colour to the backyard and make for good indoor shows.
Appropriate for outside cultivation in USDA Hardiness Zones 11th of September, the flowers may be compelled to bloom indoors and are a preferred addition to winter vacation decor.
Amaryllis may be propagated by the house gardener in a 3 ways: separating offsets, dividing bulbs, and rising from seed.
We hyperlink to distributors that can assist you discover related merchandise. For those who purchase from one among our hyperlinks, we might earn a fee.
On this article, we are going to talk about easy methods to propagate amaryllis from seed, and some great benefits of doing so.
Right here’s what we’ll cowl:
Why Develop Amaryllis from Seed?
Beginning these dramatic flowers from seed is definitely a course of, as it may take from three to 5 years for the plant to bloom, relying on the range.
Since some kinds of amaryllis are costly or may be exhausting to seek out, accumulating seeds from current crops might make sense.
Nevertheless, you have to take into account that most of those crops are hybrids, and the seeds you acquire is not going to produce true to the mum or dad plant, however might exhibit a few of its traits.
Since amaryllis hybridize simply, by cross pollinating and accumulating seeds from your individual crops, you’ll be able to simply create model new, distinctive varieties!
If you wish to produce a clone of a mum or dad plant, then it’s best to think about bulb re-sectioning or separating offsets, try our information to study extra.
Since seeds aren’t broadly obtainable available on the market, the easiest way to acquire them is from different growers or by pollinating and hybridizing your individual flowers.
Easy methods to Harvest Seeds
Flowers grown open air are prone to be pollinated naturally by bugs, however indoor-grown crops ought to be helped alongside by hand pollination.
Pollination
The flowers are self-fertile, so you are able to do this even for those who solely have one plant. The seeds is not going to produce an ideal clone within the case of hybrids, however crops will seemingly retain a few of the traits of the mum or dad plant.

Or you probably have multiple selection, you’ll be able to experiment with cross-pollination.
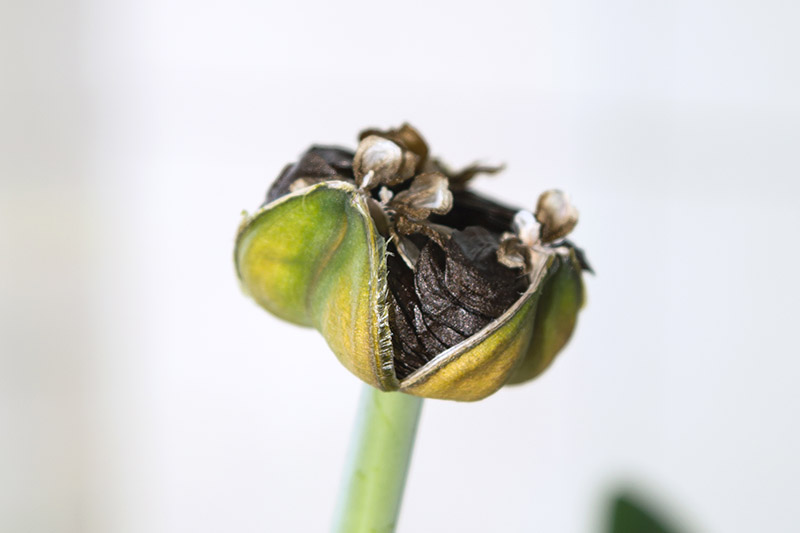
At hand pollinate your amaryllis, take a small paint brush and brush it gently on the anther of the flower to gather the pollen.
The pollen is the yellow mud that covers the information of the curved stamens, as you’ll be able to see within the picture under:
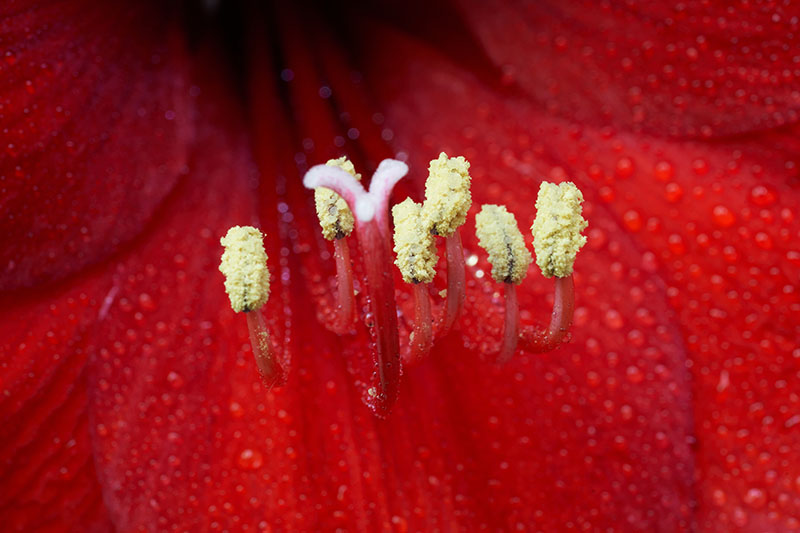
Then you definitely’ll use the comb to softly switch the collected pollen to the stigma of one other flower – or the identical one. The stigma is on the high of the type, protruding from the middle of the flower.
For finest outcomes, repeat this course of as soon as a day over the course of some days, to make sure the pollination is profitable.
Whether it is executed accurately, because the flower begins to fade, you will notice a small inexperienced pod begin to develop on the base of the bloom, behind the petals.
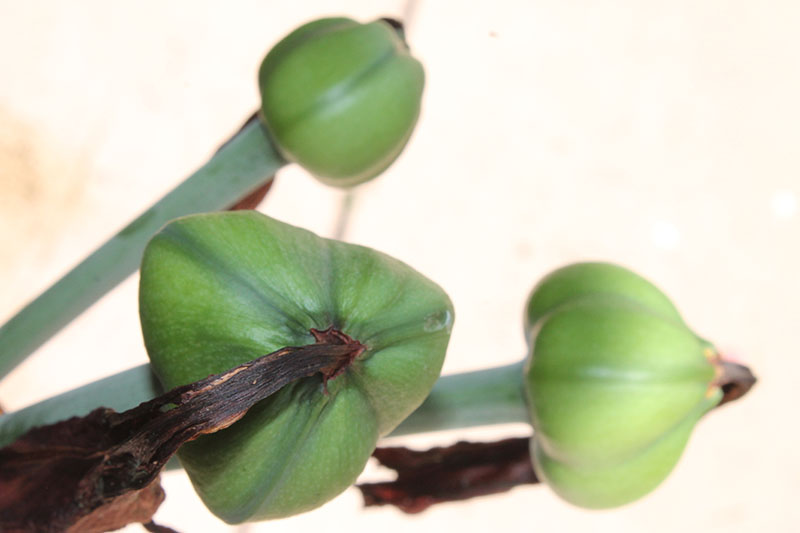
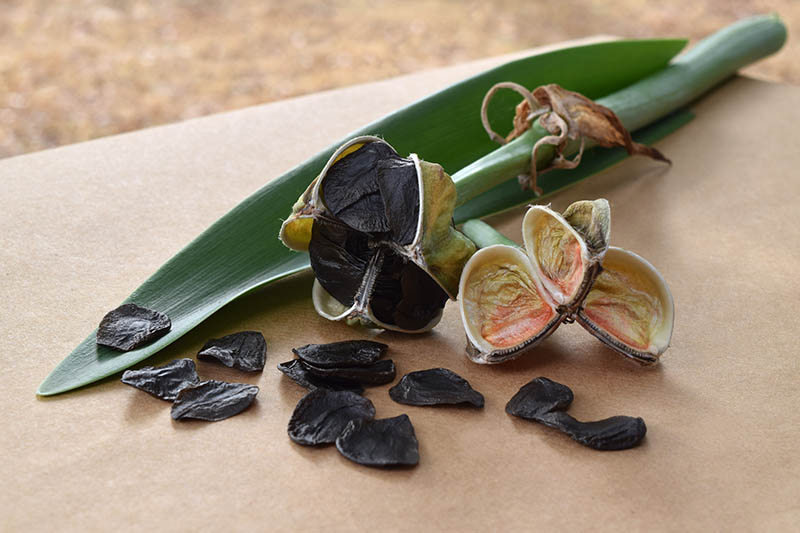
Over time this pod will swell and finally flip yellow or brown, dry out, and cut up open on the seams. This ripening course of will sometimes take about 4 to 6 weeks.
Gathering the Seeds
When the pod has dried and begun to crack open you’ll be able to lower it off the plant. Pods are sometimes divided into three sections, every containing 50-60 seeds – so you should have lots!
Set the ripe pod in a darkish location for a couple of days to proceed to dry.
To gather the seeds, shake the pod over a bowl or plate and let the seeds fall out. Throw away any that look like broken or moldy.
Unfold them out on a paper plate or tray to dry for a couple of extra days – or as much as per week.
For finest outcomes, it’s best to sow the seeds as quickly as attainable after drying, as they’ve a brief shelf life and don’t retailer very nicely. As these are tropical crops, they don’t want a interval of chilly stratification previous to planting.
For those who do must retailer them, dry the seeds for per week, after which maintain them in a sealed container in a cool darkish location like a pantry. Remember that they’ll lose viability the longer they’re in storage.
Easy methods to Sow
You possibly can sow your seeds straight right into a container or particular person seed trays stuffed with potting combine amended with perlite or vermiculite to enhance drainage.
Sow one seed per cell if utilizing flats, or one inch aside in your container, and canopy with somewhat potting medium, about an eighth of an inch deep. Water in nicely.
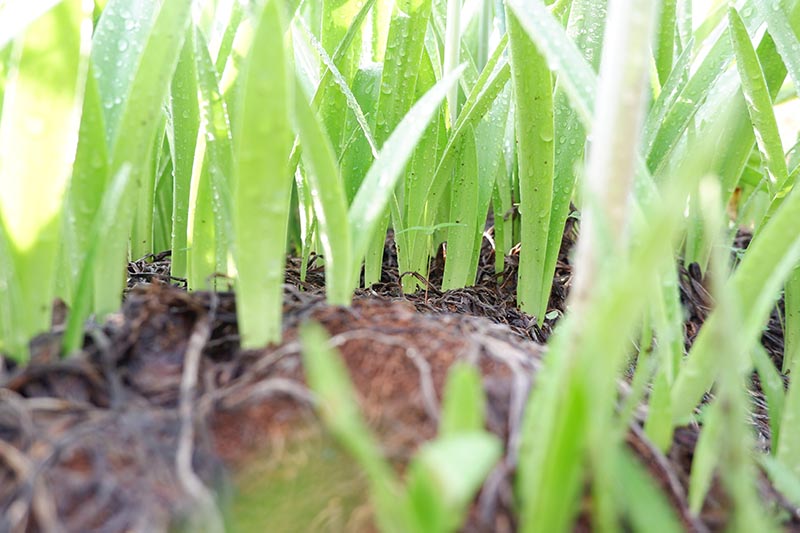
Preserve even moisture within the potting combine, however don’t enable it to turn into waterlogged. In three to 5 weeks, you’ll see that they’ve germinated as they’ll produce small grass-like leaves.
Alternatively, you’ll be able to select to sprout the seeds previous to planting in soil.
A bonus of this technique is you can begin numerous them, and solely plant those who have really germinated.
A technique to do that is to drift them in water. This may be executed by taking a transparent glass or baking pan and filling it with a minimum of an inch of tepid water. Unfold the seeds on high, discarding any that sink to the underside, as these is not going to be viable.
Cowl the container with a unfastened lid, and set it in a heat space, someplace you’ll be able to keep in mind to verify on it day by day and high up the water if any has evaporated.
In a single to 4 weeks, viable seeds will germinate and produce a single root. This root will finally develop right into a bulb. When the foundation is a half inch or longer, the seedling is able to plant.
Another sprouting technique is to wrap seeds in a moist paper towel positioned right into a sealed ziplock bag. Examine on the bag day by day and mist with water – don’t enable the paper to dry out.
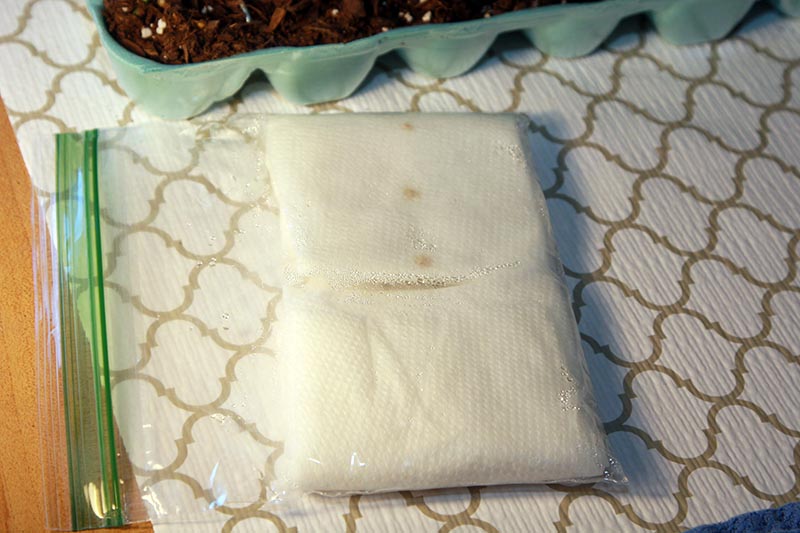
It ought to take between one and 4 weeks for the seeds to germinate, and you may plant them when the foundation is a minimum of half an inch lengthy.
Plant sprouted seeds in a well-draining, sterile potting combination in small particular person containers or in teams in a bigger container. Be sure that the containers are a minimum of three to 4 inches deep.
Use a toothpick to create a small gap for the foundation. Gently place the foundation into the opening, letting the seed casing relaxation on high of the soil or simply barely coated. Depart an inch or two of house between the seedlings, as they don’t thoughts being somewhat crowded.
Water gently and place in a heat location out of direct daylight.
Don’t overlook to label and date your pots!
As roots develop into bulblets, they are often transplanted into bigger pots.
Seedling Care
Sprouts will initially resemble a blade of grass and proceed to develop slowly over the following few years.
You will want to flippantly fertilize your seedlings as soon as each week or two, with a liquid fertilizer reminiscent of Miracle-Gro All Objective Plant Meals, obtainable on Amazon, diluted to quarter-strength.

Miracle-Gro All Objective Plant Meals
Be sure that it’s diluted, or the fertilizer can harm the tiny crops.
Seedlings ought to be saved in a heat location, reminiscent of a greenhouse or indoors on a windowsill with loads of oblique mild.
The soil ought to be allowed to dry out to an inch down between waterings, however don’t enable it to fully dry out – or turn into oversaturated. In the course of the winter months you’ll be able to put them below a develop mild.
When the foliage is 4 to 6 inches lengthy, you’ll be able to transplant your seedlings into particular person pots of a minimum of six inches deep to provide the bulbs room to develop.
Persistence is essential! Generally leaves might seem to brown and die, however don’t fear, new leaves ought to type to exchange them. Whereas all of that is taking place, under the soil bulbs are slowly rising.
For the primary two to a few years, the bulbs are creating and the plant is not going to go dormant throughout winter, however progress might sluggish.
After the second or third yr, the plant might go into its first dormancy section. This can be a good signal! It means the bulb is making a flower and may quickly reward you with a spectacular bloom.
With excellent care, blooms ought to seem annually thereafter.
Well worth the Wait
It’s true that beginning amaryllis from seed is a course of that requires lots of endurance, however for my part, it’s nicely definitely worth the wait.
It is possible for you to to create model new hybrids and be rewarded with bountiful shows of distinctive and colourful flowers for years to return.
Have you ever grown amaryllis from seed? Share your tales and images within the feedback part under!
And for extra details about rising amaryllis, try these guides subsequent: